
Starting Your Sourdough Starter
Apr 01, 2024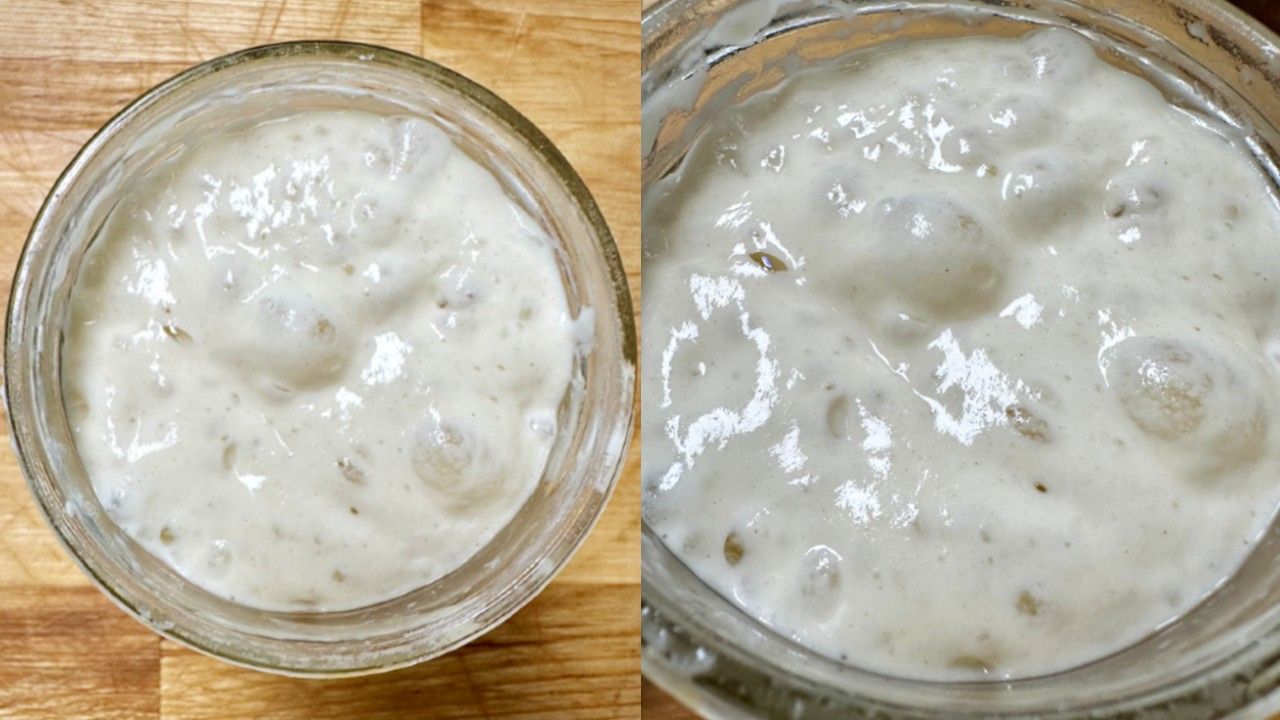
What is a sourdough starter?
Sourdough starter is a mixture of flour and water that's been colonized by wild yeast and lactobacillaceae (a family of bacteria) — a symbiotic culture that ferments spontaneously and is kept alive indefinitely through back-slopping: using a small amount of already-fermented flour to kick off each new batch.
Interestingly, not all sourdough is actually sour. How sour your bread turns out depends in part on where your starter is in its life cycle when you bake with it — more on that later in this post.
For now, here's what matters: you'll maintain your culture indefinitely by "feeding" it fresh flour and water (sometimes called refreshing) consistently. A sourdough starter is used to seed fermentation in new dough when baking bread, and is responsible for leavening and flavoring your loaf of sourdough bread. When people mention a 'continuation starter', this is what they are talking about.
Ready to get started?
If you are ready to jump in, you can make your own sourdough starter by following the directions below. It will take about 2-3 weeks, but it's easy. Just follow the steps, and check out the other links if you get hungry for more. That said, if 2-3 weeks feels long, you can always order our 'famously strong' starter instead which will have you ready to bake in 2-3 days.
You'll see lots of claims online about starters that are hundreds of years old, or have some sort of special pedigree, but most of these claims are unverifiable, and there is no intrinsic benefit to an old starter. Our starter, Larry, is "bakery-strength" — used in 2 busy bakeries creating over 100,000 loaves of bread over the last 6 years. It has never been refrigerated, and has been fed twice daily the entire time.
How to Make Brand-New Sourdough Starter
A Few Notes before You Start
Flour
- Use unbleached flour at a minimum, preferably with 50% All Purpose or Bread Flour and 50% freshly milled whole grain to begin with. The whole grain can be wheat or rye, but I prefer rye for creating a starter.
- If you don’t have access to freshly milled then try a good quality flour like Bob’s Red Mill. We use the whole grain from Janie's Mill, and they ship across the US.
Water
- Most tap water is great for creating a starter, but you want to make sure it’s not heavily chlorinated and doesn’t contain chloramine. Hard water is better than soft, because yeast and bacteria love minerals like calcium and magnesium.
- If you aren’t going to use tap water, filtered or spring water is good, but don’t use distilled or purified water. The minerals have been stripped out and they aid fermentation.
Tools
- You don't need anything fancy to get started, but if you're looking for guidance on the basics, here's what I recommend:
- 2x Glass Jars or Food-Safe Plastic Containers
- Larger container (for keeping your feeding flour blend in)
- Food Scale
- Spatula
- All Purpose Flour
- Bread Flour
- Whole Rye Flour
- Whole Wheat Flour
- Thermometer
- Tip: Weigh the container you'll be keeping your starter in by itself to get its empty weight. Write that down somewhere (or, directly on the jar). Then, you'll know the weight of the jar so you can figure out how much starter to keep, and discard, each feed.
Step One
- Make a 50/50 blend of 150g All Purpose or Bread Flour and 150g Whole Rye or Whole Wheat Flour.
- Place in a sealable container for future feeding.
Step Two
- Remove 30g of your flour blend and put it in the glass jar where your starter will live. This should be a container that can be covered, but not airtight. If you're using Weck Jars, don't use the rubber seal it comes with.
- Add 30g of water to your flour blend and stir well to fully hydrate the flour. Make sure there are no dry flour clumps remaining.
Step Three
- Cover the container and place somewhere that is well ventilated (to reduce the risk of mold developing) at warm room temperature (about 72-73°F).
- Leave untouched until you see bubbles forming to indicate fermentation is taking place, usually 24-72 hours (1-3 days).
Step Four
Once you see fermentation bubbles, you can start feeding.
- Sit a clean jar on your measuring scale, and tare to 0.
- Add 30g of your starter, 30g of your flour blend and 30g of water. You now have approximately 90g of starter. This is a 1:1:1 feed ratio because you added all equal portions.
- Discard (throw away) the leftover starter.
- Repeat the 1:1:1 feeding once every 24 hours until you see the starter begin to rise and fall. This may happen within a day or two, or could take a week or so. You may also get an initial flurry of activity, only to see it completely die back down again. This is normal, so just continue feeding once per day until it starts rising agin.
A Note from James
Each time you feed your starter at this stage you want to start with 30g of existing starter, and feed the same 1:1:1 ratio. I find it helpful to have a second container to weigh into, then scrape the remaining starter (discard) into the trash as you don’t want to use discard until you have a healthy and active starter.
Wipe out the container first with a paper towel so you aren’t putting starter down your sink, then rinse out with hot water. You can use mild detergent, but don’t use anything that’s antibacterial on it. If you use detergent make sure you rinse very well, as residue can kill a developing starter.
Once the starter begins to rise and fall, increase the feeding frequency to twice daily, ideally every 12 hours. Keep to the same 1:1:1 ratio (30g starter, 30g flour mixture, 30g water) and continue to discard the extra.
Try to keep the time of day that you feed it consistent each day, as much as possible. Keep feeding twice daily until the starter doubles reliably within 4-6 hours at 72°F. I’ve seen this happen as quickly as a week, but also seen it take 2-4 weeks as well.
Note: Be patient and keep to the schedule. If at any point you feel like the starter is failing you, just go back a step and be patient with it. Also make sure you are vigorously stirring the starter. By stirring vigorously, you are introducing oxygen into the culture. When yeast is in an aerobic environment (in the presence of oxygen) it can produce more energy from respiration than it can during anaerobic fermentation. During respiration, the yeast multiply exponentially since it has excess energy. Then once the oxygen is depleted, it flips back into anaerobic fermentation.
Step Five
Once you have a starter that will reliably double in 4-6 hours, it’s strong enough to begin leavening bread and the pH will have dropped to 4.1 or below, meaning bacterial pathogens can’t survive.
- At this stage, my advice would be to reduce the amount of wholegrain, and move to 100% refined flour (All Purpose or Bread Flour). The transition need only take a few days
- Continue feeding twice per day.
- Do not be tempted to keep it in the fridge yet. It needs to be kept out on the counter for 2-3 months to allow for the 'microbial succession' to occur, ie. the yeast and bacteria you want for a bakery-strength starter will only start appearing after this length of time. Refrigeration will stop that from happening.
Whole grain (especially rye) is higher in an enzyme called alpha amylase, which means it ferments faster. Alpha amylase breaks down complex carbohydrates (polysaccharides) into simple, fermentable sugars. In other words, it releases more fuel for the yeast from the flour. This is good for promoting enzymatic activity in a developing starter, but it also means the starter will be at peak activity for a shorter time than with refined flour, and it tends to develop acid load more quickly.
Congrats, you have a Sourdough Starter!
At this point you’ll have an established starter, but it may take a few more weeks for it to begin to mature. Feeding twice per day is the always the goal. But if you find you can only manage to feed once a day, then you will definitely want to increase the feed ratio so that it doesn’t go hungry.
Hungry starter develops acidity and affects the balance between the yeasts and lactic acid bacteria, which will weaken it over time.
Feeding / Maintaining Your Starter
Watch your starters rhythm, so that you can begin to judge how long it can go with various feed ratios. Try feeding it 1:2:2 (eg 30g starter, 60g flour, 60g water), then watch it rise and fall, seeing how long until it falls to its original level again. Then try 1:3:3 or 1:5:5.
After 2-3 months on the counter, you can move to fridge storage (if you must) in which case we recommend feeding once per week. We have an entire post on our Sourdough Starter Refrigeration Maintenance Protocols which will give you more guidelines on successful baking with a refrigerated starter.
This rise-and-fall rhythm is also what determines how sour your bread tastes — using your starter earlier or later in its cycle changes the flavor. If you want to get deeper into reading and timing your starter's peak, check out Understanding Peak: Reading and Feeding Your Starter and our other Free Resources on Everything Starter.
👉 You might also like our popular Mastering Sourdough Starter course which goes into everything in far more detail. That course is just $19.99 or entirely FREE for Bakers Club members.
🤓 LOOKING TO LEVEL UP & BAKE BETTER BREAD? ✅
Join Sourdough Geeks' Bakers Club and unlock the good stuff! Resources, events, and connection, all within a private space. It's right there waiting for you!
